Unveiling the Power of Azure Key Vault with PIN Authentication and Username – Password Matching

Welcome to another CloudBlogger Post !
In this post, we delve deep into the myriad features and capabilities of Azure Key Vault. Our aim is to illuminate how this powerful tool not only enhances your project’s security but also brings efficiency and peace of mind to your operations. Whether you’re a seasoned developer, a budding entrepreneur, or a tech enthusiast, understanding the importance and implementation of Azure Key Vault is crucial in this digital age.
Intro
What is Azure Key Vault ? Azure Key Vault is a cloud service for securely storing and accessing secrets. A secret is anything that you want to tightly control access to, such as API keys, passwords, certificates, or cryptographic keys. Key Vault service supports two types of containers: vaults and managed hardware security module(HSM) pools. Vaults support storing software and HSM-backed keys, secrets, and certificates. Managed HSM pools only support HSM-backed keys. Azure Key Vault enables Microsoft Azure applications and users to store and use several types of secret/key data: keys, secrets, and certificates. Keys, secrets, and certificates are collectively referred to as “objects”.
Workshop
What better than a little hands on to understand the how to ? For example how are we getting our secrets ? How do we manage Key Vault ? Let’s build our workshop as traditional Cloudbloggers and share our experience throughout this post ! We need:
- Azure Subscription
- VSCode or any IDE of our choice
- Patience
Our approach is simple yet it grasps the usage and power of Azure Key Vault. We are going to create an Azure Key Vault instance, and store specific key value pairs. These are smart crafted even the name plays its role since we can integrate our SDK in every aspect of the Key Vault objects. The pairs are named after a user PIN number and are stored as a single value. For example we are going to create:
- secret-1234 , value= user1:p@ssw0rd1
- secret-4567, value= user2:p@ssw0rd2
- secret-1212, value= user3:p@ssw0rd3
Can you see the dynamics? We have a PIN system where we store PIN numbers so the user won’t have to remember or even know Username & Password ! Impressive right ? Our Web App is simple, yet it is verifying via a form the correct PIN and also allows the specific user to login and proceed !
Let’s see that in action ! Let’s create a Resource Group and an Azure Key Vault instance:
# Get Subscription ID and add to variable
sub_id= $(az account show --query id)

# Create a resource group
az group create --name rg-mygroup --location northeurope

# Generate a random name for the Key Vault
key_vault_name=$(cat /dev/urandom | tr -dc 'a-z0-9' | fold -w 5 | head -n 1)
key_vault_name="kv$key_vault_name"

# Create Key Vault with RBAC for Authorization
az keyvault create --name $key_vault_name --resource-group rg-keypin --location northeurope --sku standard --enabled-for-deployment true --enabled-for-template-deployment true --enabled-for-disk-encryption true --enable-rbac-authorization true

# Add the Key Vault Administrator to you
az role assignment create --role "Key Vault Administrator" --assignee $(az ad signed-in-user show --query id --output tsv) --scope /subscriptions/$sub_id/resourceGroups/rg-mygroup/providers/Microsoft.KeyVault/vaults/$key_vault_name
Adding the Key Vault Administrator role to yourself (or a Role that allows you to edit secrets) enables us to add our secret pairs now, we have already added the secret-1234 for reference:

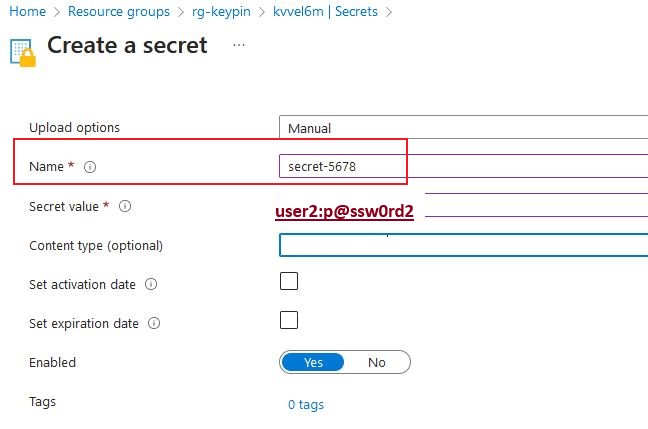
In this secret we set the PIN to 5678 with the word secret- ahead so our Code will recognize what to look for and also match the PIN to the username password values ! Pretty cool right ?
Before we move let’s grab the Vault Uri. Go to overview and see the URI on the right or run:
az keyvault show --name $key_vault_name --query properties.vaultUriOur example is using VSCode but if you are comfortable with other IDEs or Visual Studio you can just get the code ! So we start as follows:
Edit the files accordingly:
from flask import Flask, render_template, request, redirect, url_for, flash
from azure.identity import DefaultAzureCredential
from azure.keyvault.secrets import SecretClient
import os

app = Flask(__name__)
app.secret_key = 'edF32ert44rfgSAv2'  # Change to a strong secret key

# Azure Key Vault setup
key_vault_name = os.environ["KEY_VAULT_NAME"]
kv_uri = f"https://{key_vault_name}.vault.azure.net"
credential = DefaultAzureCredential()
client = SecretClient(vault_url=kv_uri, credential=credential)

@app.route('/', methods=['GET', 'POST'])
def index():
    if request.method == 'POST':
        pin = request.form['pin']
        secret_name = f"secret-{pin}"
        try:
            retrieved_secret = client.get_secret(secret_name)
            # Assuming the secret value is in 'username:password' format
            username, password = retrieved_secret.value.split(':')
            # Redirect to success page or pass username/password to the template
            return render_template('success.html', username=username, password=password)
        except Exception as e:
            # Handle error (e.g., secret not found)
            flash('Invalid PIN or secret not found.')
            return redirect(url_for('index'))
    return render_template('index.html')

@app.route('/success')
def success():
    return render_template('success.html')

if __name__ == '__main__':
    app.run(debug=True)
So with this Code in Python we achieve the following :
- A user submits a PIN through the Web Form.
- This method constructs the secret name using the submitted PIN (e.g.,
secret-1234). - If a secret with that name exists, it means the PIN is valid, and the method returns the username-password pair.
- If no secret is found for the given PIN, the application can handle this as an invalid PIN entry.
For Authorization we are using Managed Identity a a secure mechanism to provide least privilege to the Web App. You guessed right ! Time to build our Web App. From VSCode or from Azure Portal create a new Web App and a new Service Plan ( S1 is fine) for Python 3.10. Activate the System assigned Managed Identity and add the Key Vault Secrets User role to the Managed Identity.
az webapp identity assign -n WEBAPPNAME-g rg-mygroup
//Get the principalId from Output
az role assignment create --role "Key Vault Secrets User" --assignee PRINCIPALID --scope /subscriptions/$sub_id/resourceGroups/rg-mygroup/providers/Microsoft.KeyVault/vaults/$key_vault_name
Remember to add a Configuration Setting for the KEY_VAULT_NAME in the Web App also.
From VSCode deploy to Azure Web Apps or run the relevant Az Cli command:
az webapp up --name <web_app_name> --sku <app_service_plan_sku> --runtime "PYTHON|<python_version>"Allow some time to build, and browse the Web App. We are presented with the Welcome Page:

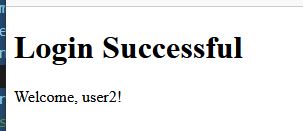
Now once we enter the correct PIN we are logged in with the matching username and password !
Closing
We have seen a small fraction of the amazing features of Azure Key Vault, a pretty cool feature where we are using PIN to Authenticate and Key Vault securely holds all of our Credentials. We can take this much further with more details, and also secure the whole Architecture with VNET Integration and Private Endpoints, as well as Front Door !
Our project stands as a testament to how cloud services like Azure Key Vault can be seamlessly integrated into web applications to implement secure authentication mechanisms. The resulting application is a fine example of combining modern web development practices with the powerful security features offered by Azure, achieving a highly functional and secure user authentication system based solely on PINs. This approach not only simplifies the user experience but also maintains a high standard of security, demonstrating the effectiveness of Azure Key Vault in contemporary web application development.
References
