How to build a lightning fast user signup Application
Part 2 : Configure Service Integration
This is the second part of our Blog Post series ” How to build a lightning fast user signup Application “.
You can start from here Service Bus with Container Apps : Part 1 – CloudBlogger@2023 and deploy the required resources.
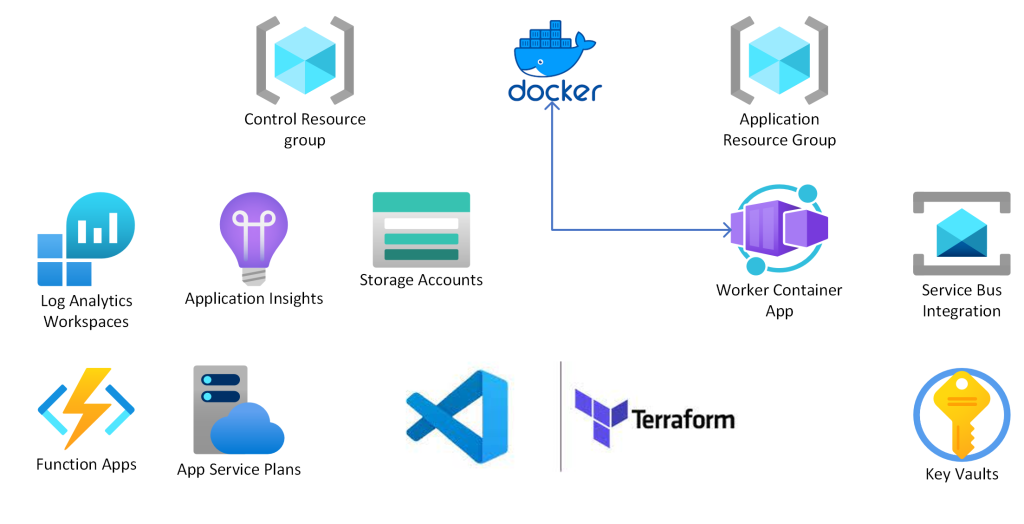
So , since we have our infra ready let’s recap.
We have 2 Resource Groups with Log Analytics , Application Insights , Key Vault , Service Bus and Function Apps. It is time to deploy our Function App Triggers, and take the URL to add to our Docker Image.
My preference over Function Apps is VSCode ,so i will provide the general steps to create the trigger.
Please have a look :
From VSCode make sure you have the latest version of azure-functions-core-tools.
Install required packages :
- npm install @azure/service-bus
- npm install @microsoft/microsoft-graph-client @azure/msal-node
Create a new HTTP Trigger with the following details :
# index.js
const { ServiceBusClient } = require("@azure/service-bus");

module.exports = async function (context, req) {
    context.log('Sending message to Azure Service Bus');

    const userData = req.body;

    if (userData) {
        const connectionString = process.env["ServiceBusConnectionString"];
        const queueName = "sbusqueue";

        const sbClient = new ServiceBusClient(connectionString);
        const sender = sbClient.createSender(queueName);

        const message = {
            body: JSON.stringify(userData),
            contentType: "application/json"
        };

        await sender.sendMessages(message);

        await sender.close();
        await sbClient.close();

/*        context.res = {
            status: 200,
            body: "Message sent to Service Bus successfully."
        };
*/
context.res = {
    status: 200,
    body: { message: 'User registration submitted successfully!' }
};


    } else {
        context.res = {
            status: 400,
            body: { message: 'User registration was NOT submitted successfully!' }
        };
    }
};
# function.json ( Bindings )
{
  "bindings": [
    {
      "authLevel": "anonymous",
      "type": "httpTrigger",
      "direction": "in",
      "name": "req",
      "methods": [
        "post",
        "get"
      ],
      "route": "submit-form"
    },
    {
      "type": "http",
      "direction": "out",
      "name": "$return"
    },
    {
      "type": "serviceBus",
      "direction": "out",
      "connection": "ServiceBusConnectionString",
      "name": "outputSbMsg",
      "queueName": "sbusqueue"
    }
  ]
}
Great ! We have our first HTTP Trigger!
Set the System Assigned Managed Identity as a Service Bus Data Owner on the Service Bus resource.
Add the Service Bus Connection String Setting from Service Bus Shared Access Policies . You can use your the Root or create a new one, and create the Function Configuration Setting with one of the Connection Strings.
Now, go ahead and update the Docker container with the provided URL from the trigger, into the HTML of the index.html file and push the updated image! Remember to save your files on VSCode!
docker build -t myusername/myapp:v3 .
docker push myusername/myapp:v3
Azure Container Apps automatically updates the image when Docker has changes, but i suggest to restart the Container just in case:
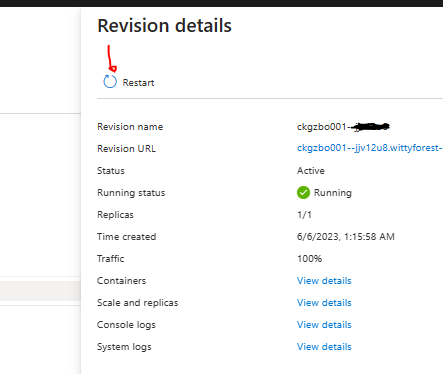
We can make a test to see what happens, so open the Container Apps URL , add info and watch the Service Bus getting the message.
This test will lead the message as Dead Letter because we have not added yet the second trigger , to write the user into Azure AD.
We are getting there ! Next we need to create our Function Trigger to import the user into Azure Active Directory with MS Graph.
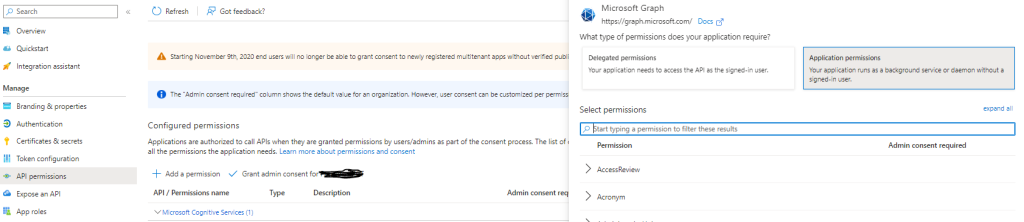
First of all, authentication ! We will create a Service Principal with MS Graph APi Permissions that will allow it to write into Azure AD. The procedure is simple , use the az ad sp create-for-rbac command , or add a new Application Registration and create a secret. Add the MS Graph API Permissions:
- Directory.ReadWrite.All (application)
- User.ReadWrite.All (application)
We will store the Application (Service Principal) Details into our Key Vault so lets do this
Create 3 new entries into Key Vault as Secrets , the Service Principal Object ID, Tenant ID and the secret.
The name of the values should be kept for we need them in our code.
Observe that our Function App has already the GET Secrets Access Policy in place from the terraform configuration script.
Install : npm install @azure/identity and npm install @azure/keyvault-secrets
Now create a new Trigger for our Function, a Service Bus Trigger with the following code :
# index.js
const { ConfidentialClientApplication } = require('@azure/msal-node');
const { Client } = require('@microsoft/microsoft-graph-client');
const { DefaultAzureCredential } = require('@azure/identity');
const { SecretClient } = require('@azure/keyvault-secrets');

async function getKeyVaultSecret(keyVaultUrl, secretName) {
    const credential = new DefaultAzureCredential();
    const secretClient = new SecretClient(keyVaultUrl, credential);
    const secret = await secretClient.getSecret(secretName);
    return secret.value;
}

module.exports = async function (context, myQueueItem) {
    context.log('JavaScript ServiceBus queue trigger function processed message', myQueueItem);

    const userData = JSON.parse(myQueueItem);
    const firstName = userData.firstname;
    const lastName = userData.lastname;
    const nickname = userData.nickname;
    const domainSuffix = 'example.com'; // Replace 'example.com' with your desired domain suffix


    // Set up authentication

// In case you dont want KeyVault
   // const clientId = 'xxxxxxxxxxx';
   // const clientSecret = 'xxxxxxxxxxxxxxx';
   // const tenantId = 'xxxxxxxxxxxxxxxx';
   // -----
// Replace with your Key Vault URL
   const keyVaultUrl = 'https://<your_key_vault_name>.vault.azure.net/';
   const clientId = await getKeyVaultSecret(keyVaultUrl, 'appRegistrationClientId');
   const clientSecret = await getKeyVaultSecret(keyVaultUrl, 'appRegistrationClientSecret');
   const tenantId = await getKeyVaultSecret(keyVaultUrl, 'appRegistrationTenantId');


    const config = {
        auth: {
            clientId: clientId,
            authority: `https://login.microsoftonline.com/${tenantId}`,
            clientSecret: clientSecret
        }
    };

    const app = new ConfidentialClientApplication(config);

    // Acquire token
    const tokenRequest = {
        scopes: ['https://graph.microsoft.com/.default']
    };

    const authResult = await app.acquireTokenByClientCredential(tokenRequest);
    const accessToken = authResult.accessToken;

    // Set up Graph client
    const client = Client.init({
        authProvider: (done) => {
            done(null, accessToken);
        }
    });

    // Create a new user in Azure AD
    const newUser = {
        accountEnabled: true,
        displayName: `${firstName} ${lastName}`,
        mailNickname: nickname,
        userPrincipalName: `${nickname}@${domainSuffix}`,
        passwordProfile: {
            forceChangePasswordNextSignIn: true,
            password: 'mYComp@2022!@'
        }
    };

    const createdUser = await client.api('/users').post(newUser);

    context.log(`User created with ID: ${createdUser.id}`);

};
# function.json (Input Binding)
{
  "bindings": [
    {
      "name": "myQueueItem",
      "type": "serviceBusTrigger",
      "direction": "in",
      "queueName": "sbusqueue",
      "connection": "ServiceBusConnectionString"
    }
  ]
}
Our Solution is ready ! In my setup the Service Principal is from another Tenant diplaying the flexibility of Azure Integration even between different Directories!
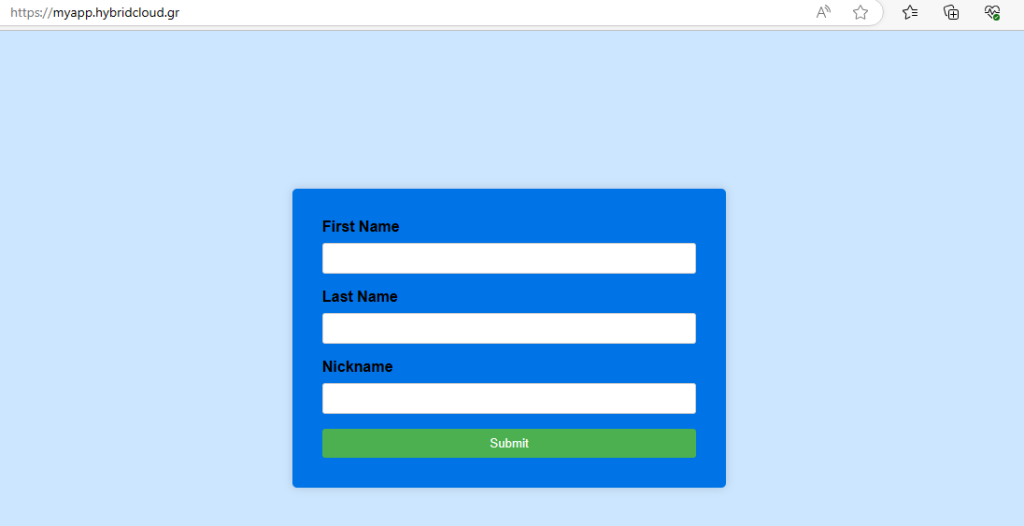
So to sum it up , we uncovered the functionality of Service Bus by example, creating a simple Web App in Docker, hosted in Azure Container Apps and we have a simple and very fast Azure AD user subscription system.
The final touch is to add our own custom domain!
So from the Azure Portal , Container Apps -Settings we add a custom domain:

Write the domain and you will be preented the option to Upload the Certbot certificate ( or any PFX Certificate for this domain)
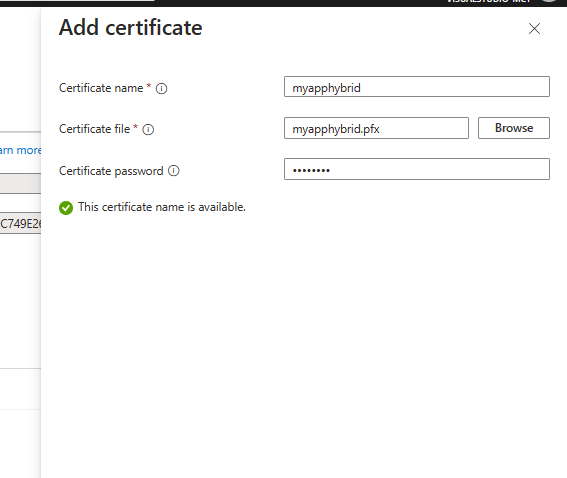
Proceed with the Validation steps by adding the TXT and CNAME records and that’s it !
Final Thoughts
Integration is key for Cloud Services and Azure is a perfect example of how Integration can help us create unique solutions with ease. Azure Service Bus along with Container Apps and Function Apps helped us create a Web App, that can register users into Azure AD fast and reliable.
Links & References
- Azure Service Bus – Build a Lightning Fast Solution
- Intro to Azure Service Bus
- Azure Container Apps – Overview
- MS Graph SDK – Overview